Welcome to iPacky
Step 1: iPacky Dashboard

In the iPacky Dashboard you will do the initial setup, see reporting/statistics, and do maintenance. If you have not gotten an email with login details, please contact iPacky.
The main screen in Dashboard will give you the packing status.
Settings
Go through the settings and customize iPacky to your needs. You can skip this step initially because there might be nothing here you need to do in order to start using iPacky.
One of the most important setting is Orders are fulfilled before iPacky. Should be set if you fulfill the orders before checking the order in iPacky. For example if you create shipping labels and fulfill the order first.
Users
Add users. Don’t give users more role rights than necessary. Don’t let multiple persons use the same user. In order to be able to pick and pack orders, a user needs to have a Packer role. If they start the main iPacky scan screen from the Dashboard, they need to have a username and password. This is useful if you don’t want the packers to have access to the Shopify Dashboard, or browser rights issues with third-party cookies.
Step 2: Scan screen
The scan screen can be reached either through the apps in the Shopify Dashboard, or by Run iPacky from the iPacky Dashboard menu. If Run iPacky is missing from the iPacky Dashboard, that user does not have the Packer or Validator role.
The scan screen is where the actual work with picking, packing and printing pick lists is done.
To check an order, simply type the order number, or scan order barcode.
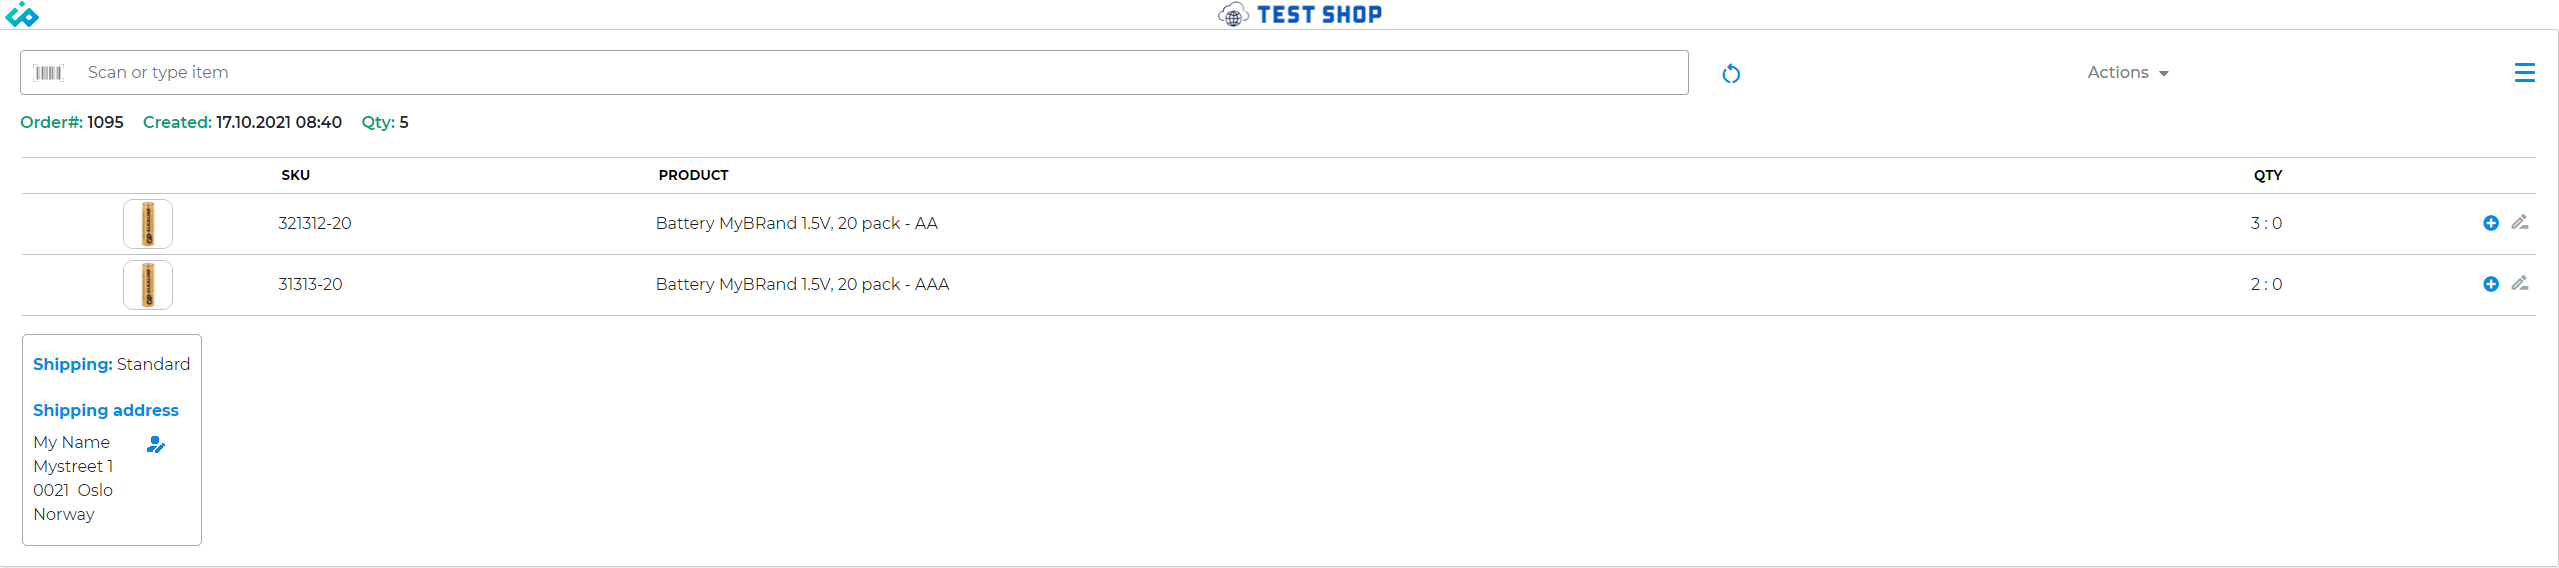
An opened order can look like this:
Or:

This example shows a quite advanced order with lots of customizations. When you try to open an order, it would much likely look much simpler. This example order has order notes, timeline notes, showing tags and packers note. In addition, it has virtual products, product notes and bin locations. These are all options in Settings, and Metafields.
After order is opened is as simple as using the barcode scanner to scan the products on the order. When a order line is completed, it will turn green:
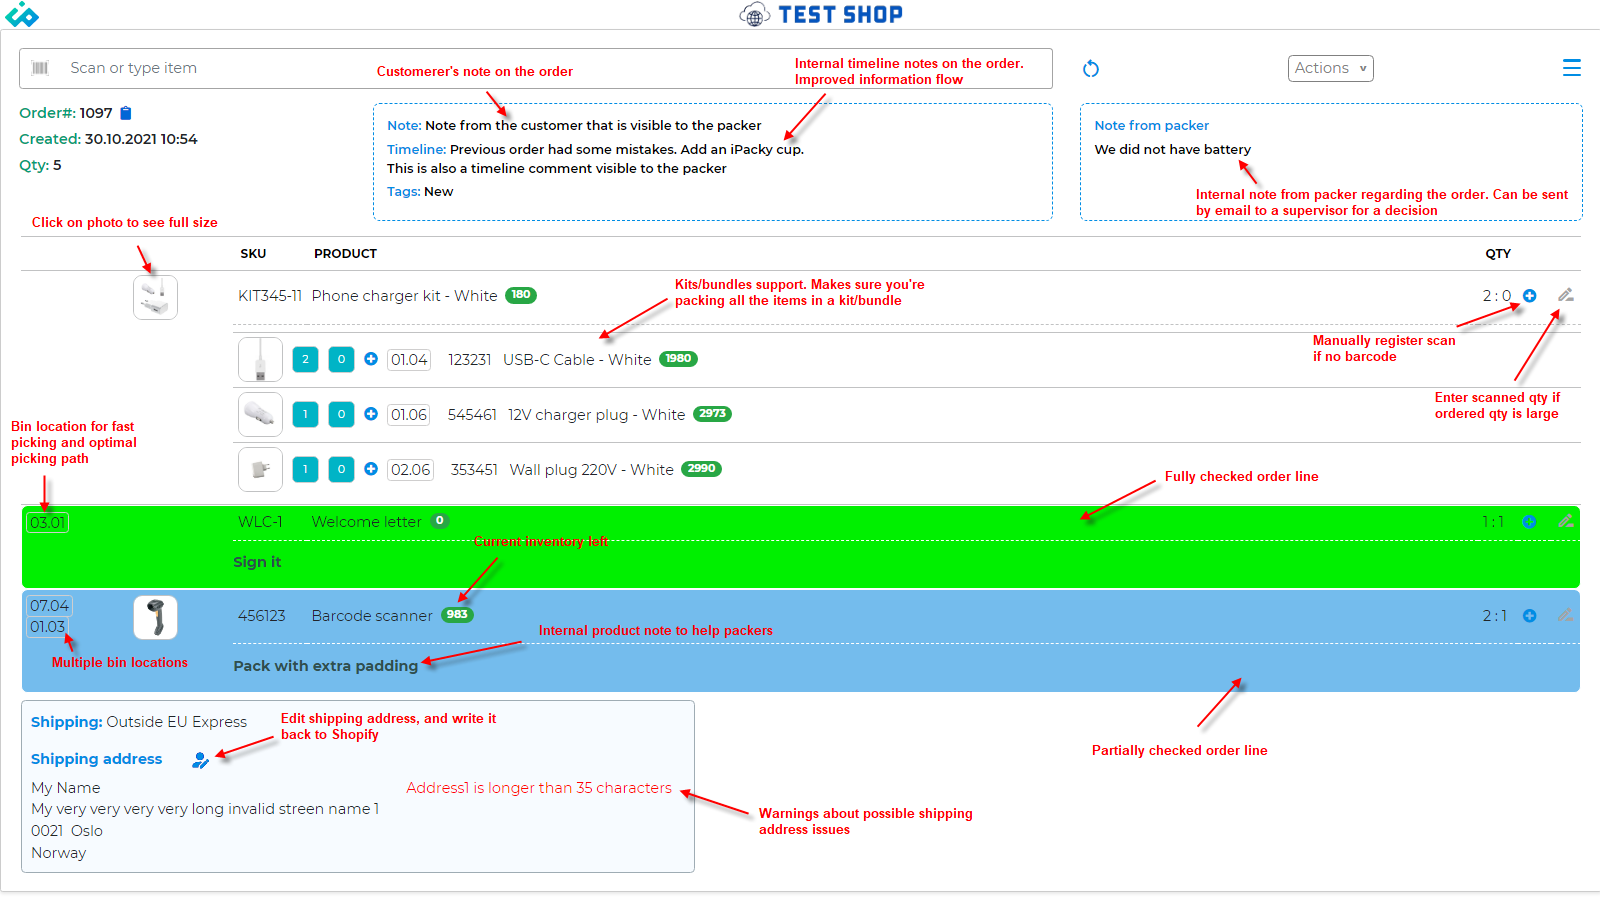
The light blue lines are order lines that has partially been completed.
If the product does not have a barcode, then the SKU can be entered, or manually enter the scanned quantity by clicking on the edit icon at the end of each order line.
If scanning, or entering products not on the order, a dialog will show, with a sound.
When everything is scanned and ok, it will be ready for the next order.
Step 3: Picking lists
Furter steps
Metafields: virtual products, product notes, barcode aliases, bin location