With the Sendcloud connector you can connect iPacky and Sendcloud directly. This means that you don’t need to go into another app to create the shipping labels but can get it directly after checking the order.
In order to use this connector, you need to have a working Sendcloud subscription and Shopify app. Follow the directions in the linked document on this page.
When the order check in iPacky is complete, the shipping label will be printed instantly on your printer via the PrintNode connector.
Tip: If Sendcloud is connected, you can also do bulk printing of shipping labels. This can speed up the process if the order has only one specified product.
Then you can print out all the shipping labels for this product, and just pick&pack this item.
Please read this document for detailed instructions of how to install
All rules, carriers, and other settings have to be set up in Sendcloud for the connection to work.
- In the Sendcloud panel, select Settings→Printing and set the correct Label format. Usually, this is A6 for a label printer.
- In the Sendcloud panel, select Settings→Integrations to add the Shopify connector, and Sendcloud API (if it is not already connected).
- In the Feedback to the webshop drop-down, make sure that it’s set to Change the parcels’ status to “sent” once the carrier scans the label, or Don’t send any feedback
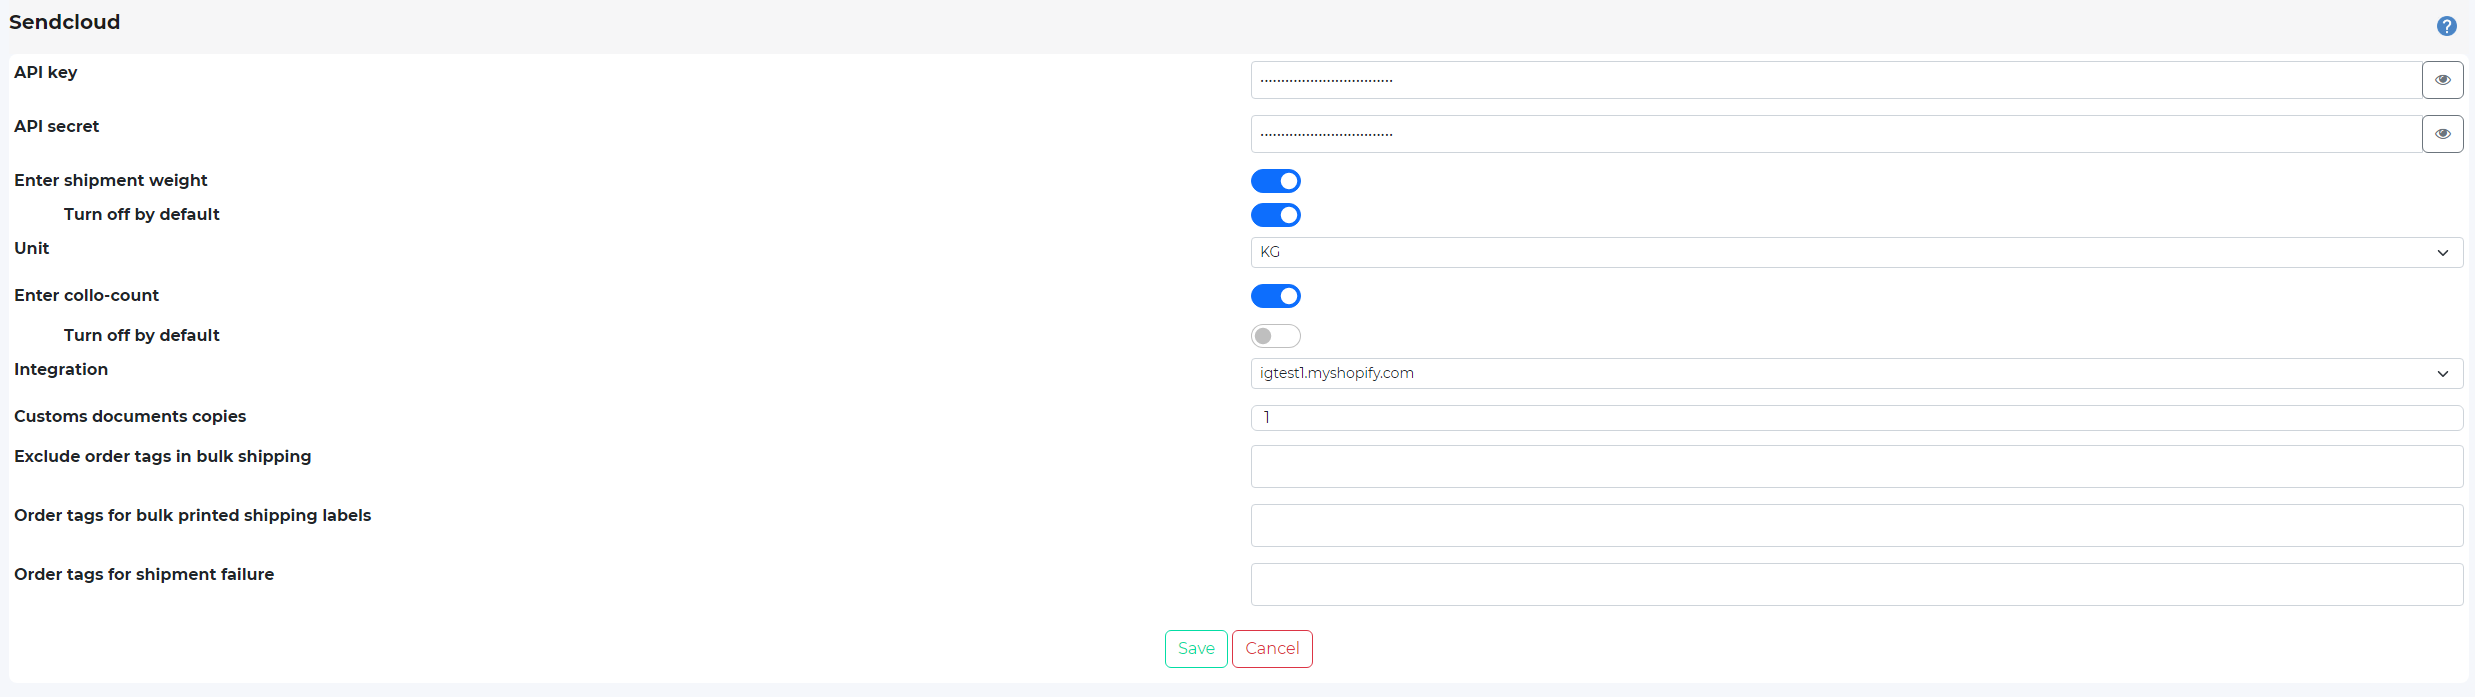
- In the Sendcloud API, copy the Public key and Secret key. Click on the icon in iPacky’s Sendcloud setup and paste the values → API key=Public key, API secret = Secret key.
- The Integration dropdown is used to select which shop you are connecting to in Sendcloud. Usually only one is available.
- Customs document copies can be set to more than one copy of the printed customs document (if any).
- The Order tags for shipment failure can be used to set tags on the order if there is an error during label creation. After fixing and re-checking the order, these tags will be removed from the order.
- Enter order tags that should be excluded (if any) when using Print bulk shipping labels in Exclude order tags in bulk shipping.
- Enter order tags that orders printed in Print bulk shipping labels should be marked with (if any).
- Default country of origin. Will be used in customs declaration if this does not exist on the product in Shopify.
- Default customs code. Will be used in the customs declaration of this does not exist on the product in Shopify.
- Tax numbers. Here you can enter the tax numbers for customs declaration. See the table of tax number values below.
- Enter collo-count is used if you are using multi-collo shipments. It will show a dialog after the order check where you can enter the collo-count. Tis is usually left unchecked. If selecting this option, a new setting with the text “Turn off by default” is shown. This is useful when only some of your orders need a different collo-count than 1. This setting can be overridden per order in the Actions menu in the order check screen. To be used with caution as this might cause issues with your carrier and pricing. Also it might not work correctly with export. Please contact Sendcloud about more info about this.
- Enter shipment weight is used if you want to override the calculated weight of the order. A dialog will be shown where you can enter the total shipment weight. This is usually left unchecked. If selecting this you will also get an option of entering the default weight. If blank or 0 it will show a blank weight. If -1 it will show the weight of the order from the Shopify order. The setting “Turn off by default” is shown. This is useful when only some of your orders need a different shipment weight than the order weight from Shopify. This setting can be overridden per order in the Actions menu in the order check screen. The unit value is the default weight unit when the dialog is shown. This can be overridden on the shipment weight dialog. It will look like this:

Tax numbers |
|---|
|
NOTE: New orders appear in Sendcloud about 5-10 minutes after they are placed, so they may not be ready when you check it in iPacky. This is because of how Sendcloud connects with Shopify. The same applies if you make changes to an order in Shopify.
Troubleshooting
- Check that the API keys are correct. If it works once, it should work forever, unless you change the API key and secret key in Sendcloud API.
- If the shop name is not appearing in the Integration drop-down, the API keys are incorrect, or not set up on the Sendcloud side.
- In case of error when creating the label, the most likely cause is that the order is not available in Sendcloud yet. This can take up to 5 minutes.
- The other common error is that the address is marked in Sendcloud as invalid. Make corrections on the shipping address in iPacky or Shopify, and try again.
- Another possible cause is that the weight of the shipment is set to 0 in Sendcloud, or that there is something wrong with the shipping method selected. Look at the order in Sendcloud to see the cause of the error.
- If the label has not printed, check that PrintNode is up and working and that the printer is turned on. Also look in View PrintNode jobs.
- If an error message comes up with a message that invalid shipment, or shipping type not available when trying to create a label in the order check, the problem is in the shipping rules setup in Sendcloud. Please contact Sendcloud about this.