With the nShift Delivery connector, you get a very powerful and flexible shipping label connector for mainly the European market with automatic print of the shipping label after checking the order in iPacky.
About nShift Delivery
We’re excited to announce that iPacky OMS has partnered with nShift to bring seamless shipping and label creation within iPacky’s native platform experience.
With the iPacky nShift Delivery connector, you will stay in the iPacky interface all the time, with no need to switch to the nShift Delivery user interface.
It’s very flexible and powerful. You can change carrier/service, number of parcels, shipping address and properties on the shipping. Such as Signature required or Authority to leave. It also supports Shopify locations for shipping from different locations and partial fulfillments.
For this to work, you need PrintNode installed.
In order to use this connector, you need to have a working nShift Delivery plan.
After setting up nShift Delivery, you must add the nShift Delivery connector in Connectors→Manage. After that, the nShift Delivery connector will appear when you expand the Connectors, and you can select it.
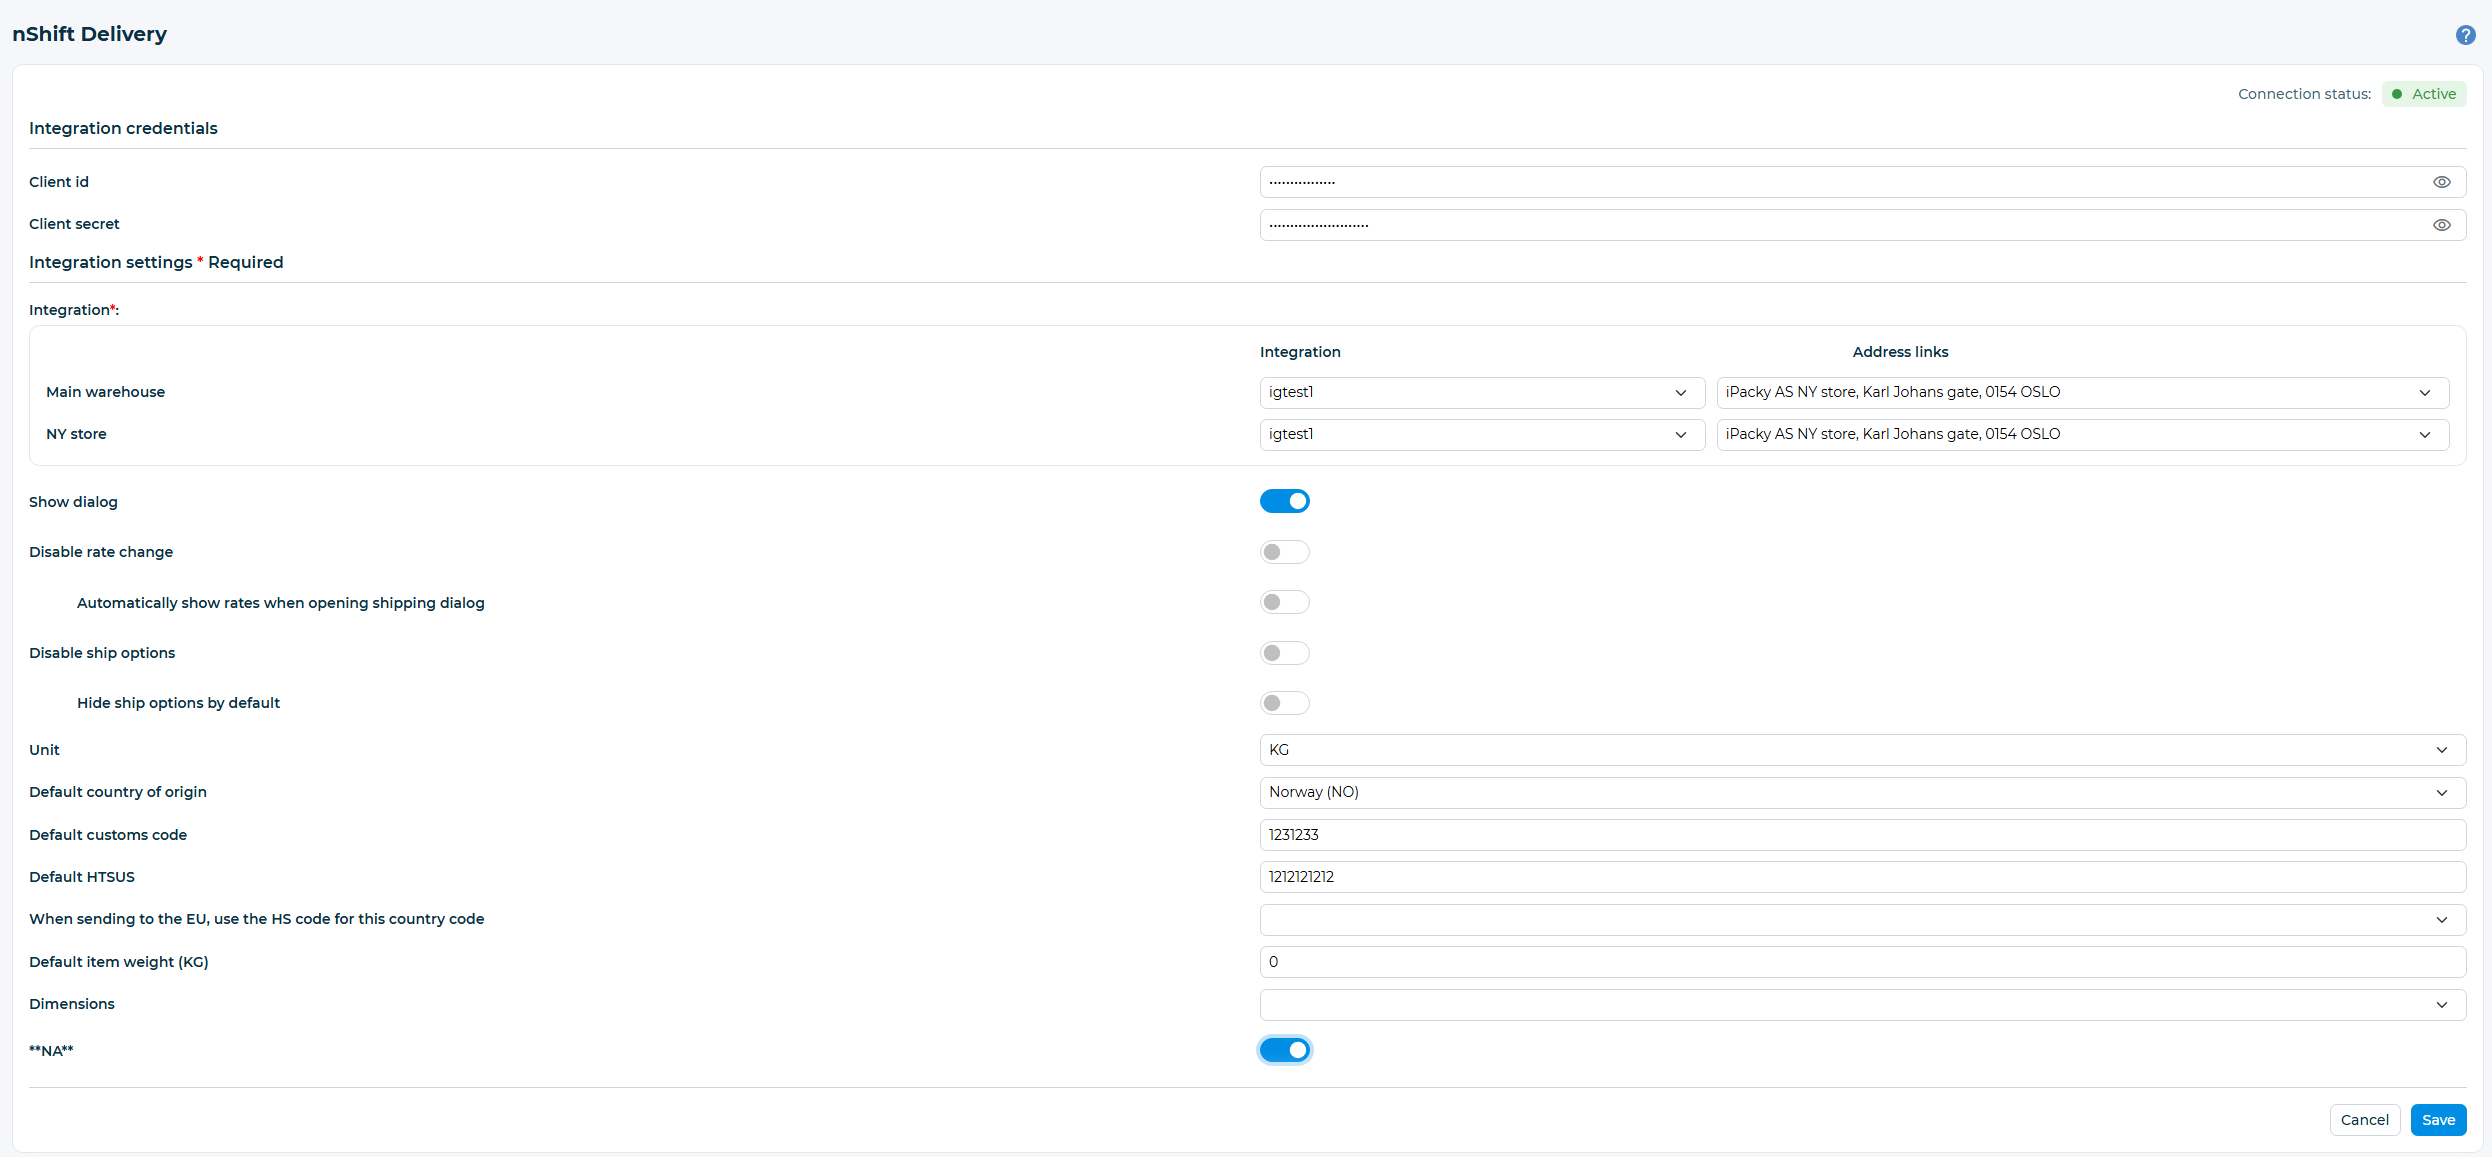
You have to create the Client id and Client secret in the nShift Delivery web interface.
Setting | Description |
|---|---|
Client id | The client id from nShift Delivery |
Client secret | The client secret from nShift Delivery. Click Save after this, and the Connection status should show green |
Integration | Here you select the integration from nShift Delivery. You might have multiple Shopify locations, and multiple integrations. Also select which sender address to use. This is set up in nShift Delivery |
Show dialog | If the nShift Delivery dialog in iPacky should always be shown after the order check. If off, you can still select that per order in the Actions menu |
Disable rate change | If on, it will not be possible for users to change the rate (carrier/service), but must use the one selected by nShift Delivery |
Automatically show rates when opening shipping dialog | If on, it will automatically expand all the rates possible when opening the shipping dialog |
Disable ship options | Whether or not the user is permitted to set ship options (such as signature, age check etc) |
Unit | The weight unit you want to be used in the shipping dialog |
Default customs code | The default HS code to be used when the product in Shopify does not have Harmonized System (HS) code |
Default country of origin | The two letter country code, for example US. This is used when the product in Shopify does not have country code of origin |
Default HTSUS | The default US customs HS code to be used when the this is not registered on the product when sending to the US |
When sending to the EU, use the HS code for this country code | Select the country code to match with the HS code for a country in Shopify for the variant when sending to the EU |
Default item weight (KG) | The product weight that will be used if the product weight in Shopify is 0. |
Dimensions | The dimension unit that will be used on the parcel in the shipping dialog |
The shipping dialog with the nShift connector can look like this:
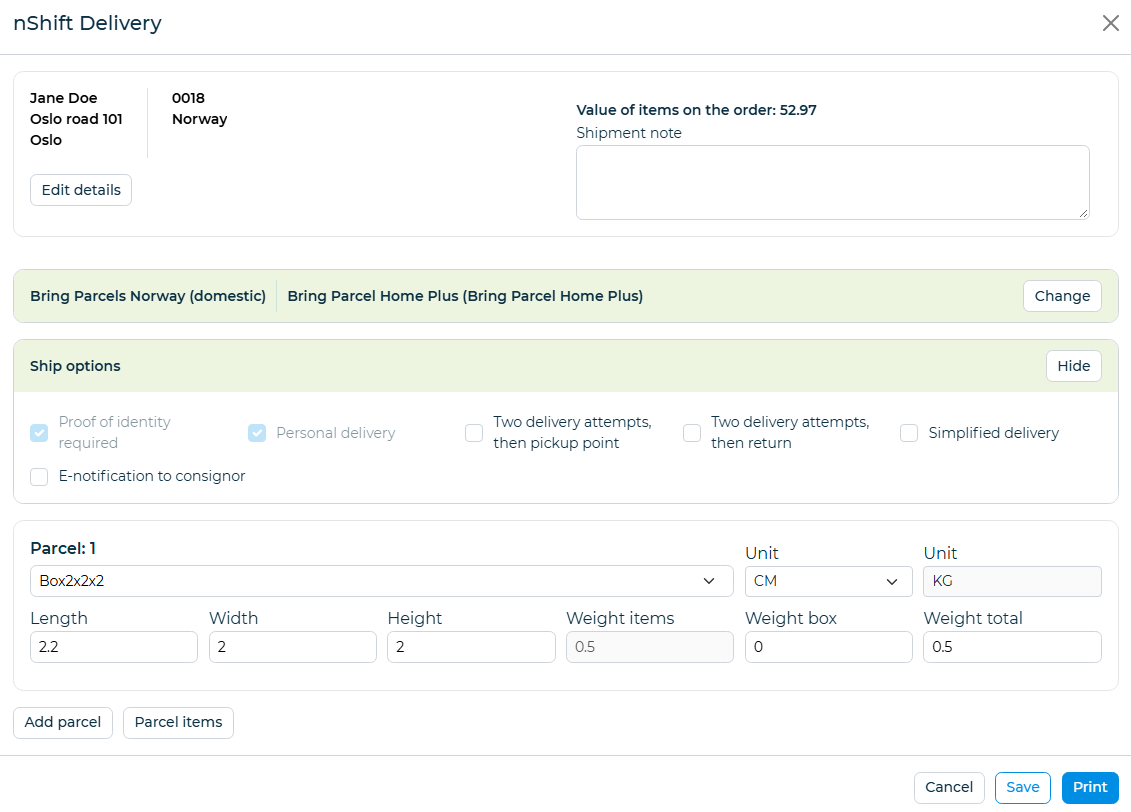
The initial carrier/service is set by nShift Delivery and rules there.
Here you can select the dimension and weight of the shipment. The Box drop-down show the boxes defined in Dashboard→Tools→Boxes. The dimensions/weight can be overridden . You can even add parcels and return labels.
For each parcel, you can set the dimensions and weight.
Note: not all carriers/services support multiple parcels in a shipment.
The Shipment note is used to write a note to the carrier/driver. This might not be visible with all carriers on the shipping label.
By clicking on Change, it will show the available carriers/services and the price. Keep in mind that not all of them might be valid for the shipment.
You can also select some properties of the shipment depending on the carrier/service. It might also be possible to select a property that is not valid for the selected carrier/service. This will trigger an error.
By clicking on Print, the shipping label will be produced. Clicking on Save will save the changes you have made, and you go back to the order check screen.