With the Ship&Co connector, you get a very powerful and flexible shipping label connector for the Japanese market with automatic print of the shipping label after checking the order in iPacky.
Note: iPacky is available in Japanese so all of iPacky can be shown in Japanese.
About Ship&Co
Ship&co seamlessly connects major international carriers such as DHL, FedEx or UPS and Japan domestic carriers. By utilizing Ship&co, you can streamline the shipping process in under few clics, saving 90% of your time.
With Ship&co, registering carrier accounts and printing shipping labels takes just a few minutes. We smoothly integrate with all major international and Japanese carriers for both domestic and international shipments. Additionally, we offer shipping cost comparisons for international shipments. Whether it’s domestic or international, individual contract rates with carriers will be applied. Leave the efficiency of your workflow to Ship&co—we’ve got you covered.

With the iPacky Ship&Co connector, you will stay in the iPacky interface all the time, with no need to switch to the Ship&Co user interface.
It’s very flexible and powerful. You can change carrier/service, number of parcels, shipping address and properties on the shipping. Such as Signature required or frozen goods. It also supports Shopify locations for shipping from different locations and partial fulfillments.
For this to work, you need PrintNode installed.
In order to use this connector, you need to have a working Ship&Co plan. You must also have completed the setup in Ship&Co with connection to Shopify so you have an order channel.
After setting up Ship&Co, you must add the Ship&Co connector in Connectors→Manage. After that, the Ship&Co connector will appear when you expand the Connectors, and you can select it.
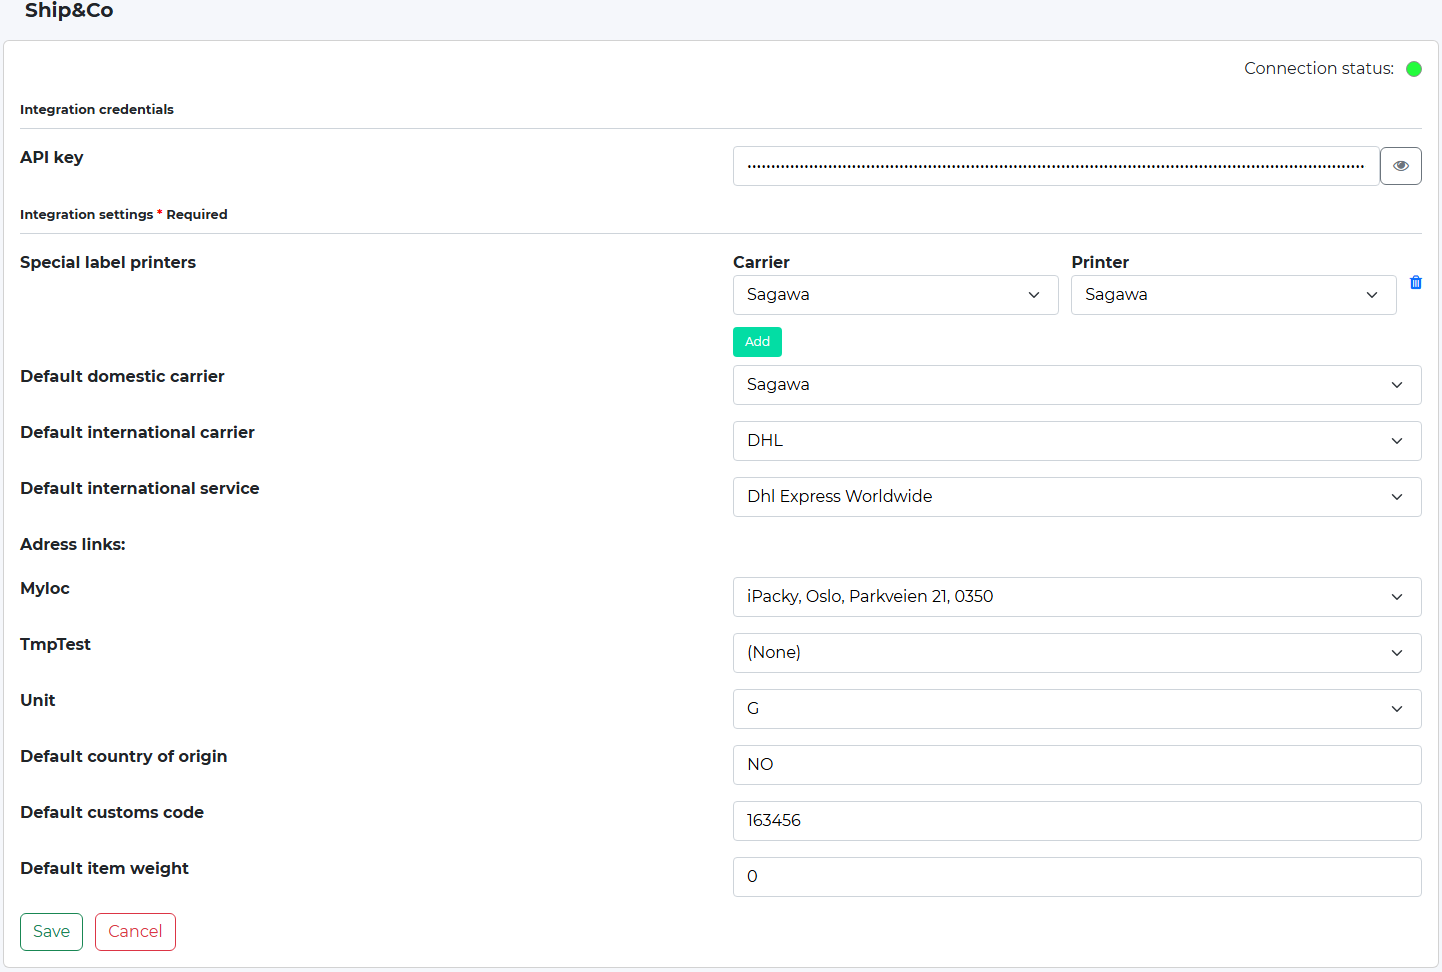
Setting | Description |
|---|---|
API | The API key from Ship&Co |
Special label printers | Read about this in the Ship&Co document above |
Default domestic carrier | The default carrier to be used by default for domestic shipments |
Default international carrier | The default carrier to be used by default for international shipments |
Address links | In the Address links you must link your Shopify location(s) to a corresponding sender address from Ship&Co |
Unit | What unit should be used by iPacky on the weight |
Default customs code | The customs code to use if this in not on the product in Shopify |
Default country of origin | Two letter country code to be used when this info is not on the product in Shopify |
Default item weight | The weight to be used if product weight is 0 in Shopify |
The shipping dialog with the Ship&Co connector can look like this:

Here you can select the dimension and weight of the shipment. The Box drop-down show the boxes defined in Dashboard→Tools→Boxes. You can even add parcels.
For each parcel, you can set the dimensions and weight.
Note: not all carriers/services support multiple parcels in a shipment.
The Shipment note is used to write a note to the carrier. This might be visible with all carriers.
By clicking on Get rates, it will show the available carriers/services and the price. Keep in mind that not all of them might be valid for the order. If internation order, it will only show carriers which sends international, and for domestic, only domestic carriers.
You can also select some properties of the shipment depending on the carrier/service.
By clicking on Print, the shipping label will be produced. Clicking on Save will save the changes you have made, and you go back to the order check screen.