iPacky can connect to some of the most popular third-party shipping platforms to (shipping integration) to give you an even better workflow with the complete fulfillment workflow in the iPacky interface. Please contact these shipping apps to find the best one suited for you.
PrintNode is required for use with our shipping connectors:
- Sendcloud (Send from much of Europe)
- Shippo (Send from US/Canada). It will also work in some other regions
- Webshipper (Send from much of Europe). It will also work with DHL/FedEx/UPS/USPS from any country in the world, especially the US
- Starshipit (Australia/New Zealand/UK). It will also work with DHL/FedEx/UPS/USPS from any country in the world, especially the US. Use our referral link to get a discount
- Ship&Co (Send from Japan)
- CargonizE2/Logistra (Send from Norway)
- ProfraktE2/Profrakt (Send from Norway)
- ShippyPro (Send from much of Europe)
- MyParcel (Send from BE/NL. Not recommended!)
Shipping dialog
Depending on the shipping connector chosen, it might look like this after the order has been checked in iPacky:
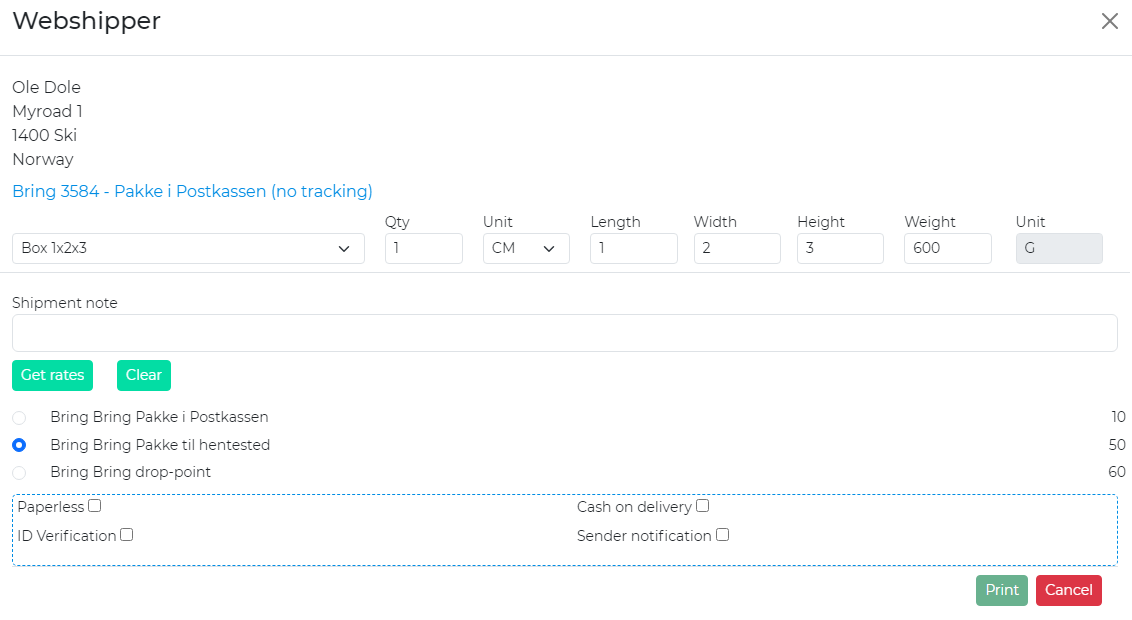
Depending on the connector, you might have several options here.
The big advantage is that you stay in the iPacky interface all the time, and no need to switch to the interface of the shipping app.
iPacky will fulfill the order in Shopify, add tracking info, and optionally instruct Shopify to send the shipping confirmation email. This is done in Tools→Fulfillment rules.
The setup for this is available for users with Administrator role only.
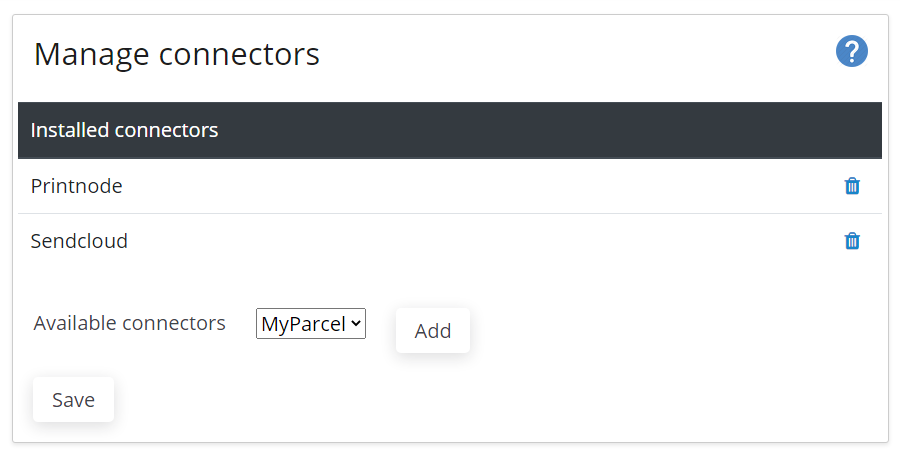
iPacky Dashboard→Connectors→Manage
You can manage available connectors completely on your own on the Dashboard.
To add a connector, just select from Available connectors, and click Add. To remove a connector, click on the trash bin icon.
After adding, the setup of the connectors will be in Dashboard→Connectors